
Step-by-step Guide to a Google Play Store Upload
For more than a billion people worldwide, Google’s Play Store is where they browse for their applications. Here’s how to get yours on it.
For more than a billion people worldwide, Google’s Play Store is where they browse for their applications. Here’s how to get yours on it.
Let’s suppose you just finished working on your mobile app and it’s finally ready. Now is the time to publish it, but you have no idea where to start the process. You’ve spent long hours refining the details of your work, and you’d like to finally share your achievements with the world. Here’s a step-by-step guide to getting an app on the Play Store.
The first step to an app release is to set up a development account in the Google Play Console. You’ll be prompted to accept the distribution agreement and indicate that if your e-mail address violates this agreement, you will not be able to register as a developer. Next, you’ll need to make a payment to register. Provide your account details as well as the name of the application that will be displayed on the Play Store.
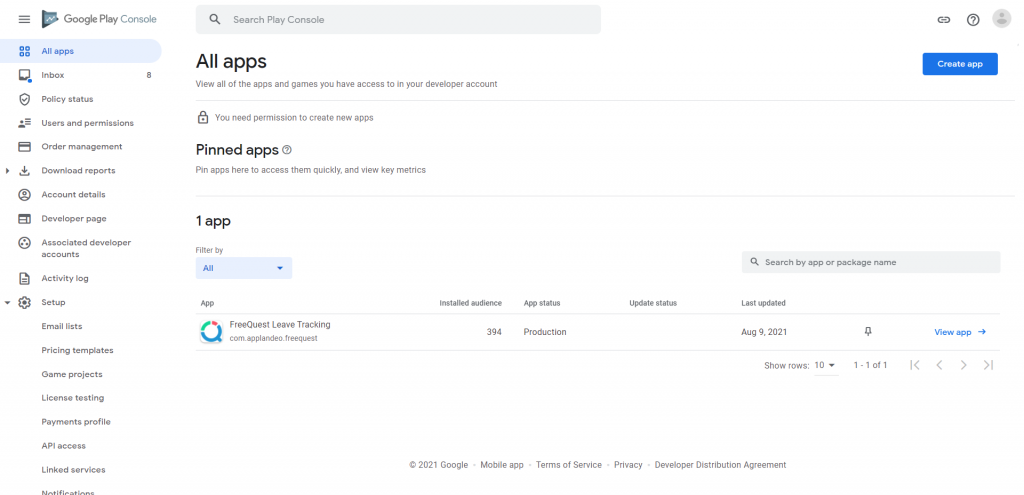
After selecting an application, you will see these navigation items, categories, and pages:
To start, you have to have a profile in the Google Payments Center to sell apps and app products on Google Play. Once created, it will be automatically connected to the Play Console. Such a profile will allow you to sell services, sell reports, pay for transactions and perform other activities. In the play console, click download reports and then finance. Set up a merchant account and provide information about your application. If you do not have a bank account required to receive payments, Google may not be able to otherwise pay you for products sold on your account.
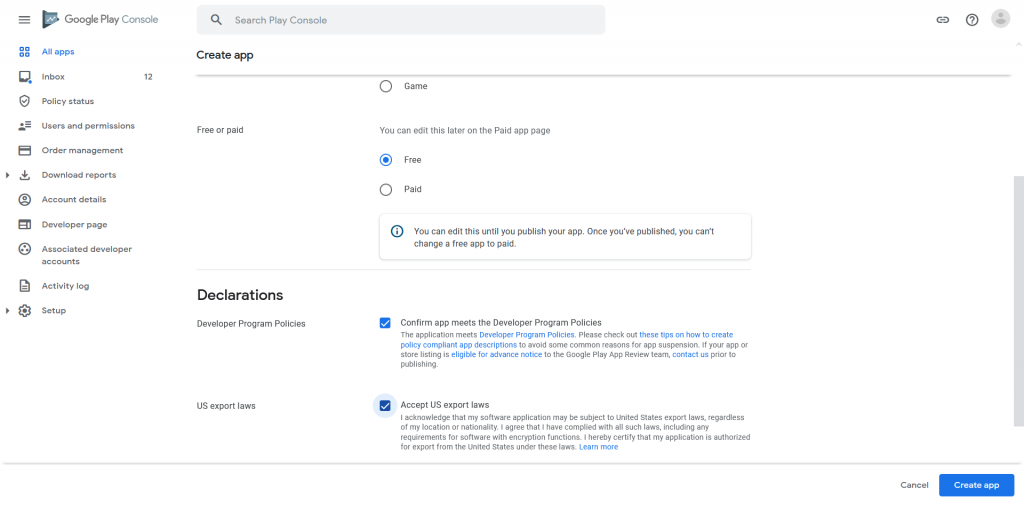
After signing up for a Google Play developer account, you can create and configure applications in the Play Console. To create an application:
As you fill in your App Store listing, be sure to follow some of the guidelines and fill in all the necessary details. Here’s also where you can add keywords into your listing to optimize your product for search terms. However, don’t hesitate to reach out if you need help with building your Android app.
Whether you are uploading the app for the first time or updating it, the status of the publication allows you to determine its availability on Google Play. When you select an application in the Play Console, you will see the latest publication status under the application and package name.
There are three types of publication status:
Every application intended for publication in the Play Store should have its own certificate with which it will be signed. The entire process of generating such a certificate can be carried out from the level of Android Studio:
Now is the time to test your applications against a specific group of users and run some tests. It is important to confirm that an application is fault-free before sharing it. Test it to eliminate any technical problems and irregularities.
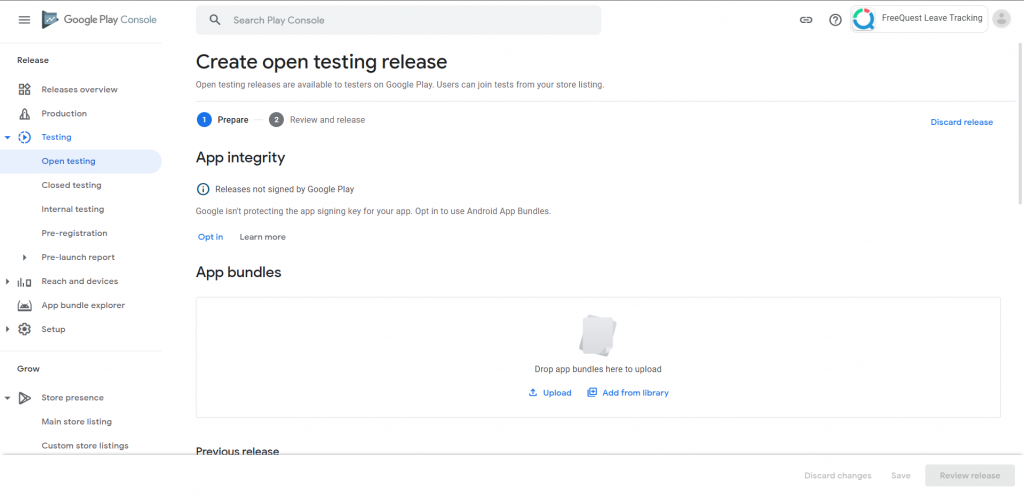
Internal test — managing a maximum of 100 testers, or Open test — publishing the test version of the application on Google Play.
Open test (versions for open tests are available to testers who can join the tests from the application information level)
Closed test (closed test versions are available to a limited number of testers of your choice who can test the pre-release version of the application and provide feedback on it)
Internal test (internal test versions are available for up to 100 testers of your choice)
Production (production versions are available to all Google Play users in the countries you choose)
Testers will be able to find your test app on Google Play if you’re running an open test. For an internal test, share the URL with testers.
Testers can’t post public reviews on Google Play, so it’s a good idea to add a feedback channel or tell them how to provide feedback.
Remove users from application tests. In the Play Console, find the test you want to end and click Manage Track. Then select Pause Track so that testers do not receive application updates after the tests are completed.
Once you’ve set up your store listing, prepared your app for review and set up your app’s prices, you can go ahead and publish the app.
You can use standard or scheduled publishing to publish an update to an existing app:
Standard publishing — updates to existing applications are processed and published as quickly as possible.
Scheduled publishing — Updates to existing applications are processed as usual. Once approved, you have full control over when the changes will be published.
It collects information from users about what they do in the first place in a newly downloaded application. By using this function, developers can focus on optimizing the application so that the most frequently used options of a given application work quickly and efficiently during the first launch. The algorithm successively collects information from users who decide to download a given application, including yours. The collected data is sent to Google, where algorithms set user behavior trends. The company informs that such information will translate into three main benefits:
As you can see, a Google Play Store upload isn’t such a complex process. If you’ve managed to design a great application, adding it to the Play Store won’t be a problem for you if you follow these tips. Don’t skip any steps, act accordingly, and all the work will take a little time of your day…or two.
 Hi, I’m Marcin, COO of Applandeo
Are you looking for a tech partner? Searching for a new job? Or do you simply have any feedback that you'd like to share with our team? Whatever brings you to us, we'll do our best to help you. Don't hesitate and drop us a message!
Drop a message