
iOS Project with Bitrise, Bitbucket and Danger
Let’s take a more in-depth look into DANGER and its configuration and integration with BitBucket and Bitrise.
Let’s take a more in-depth look into DANGER and its configuration and integration with BitBucket and Bitrise.
Nowadays, developers have potent tools available that can improve the deployment process. We don’t need to have a separate machine to use as a Continuous Integration server. We don’t need to write complicated scripts with Fastlane usage to automate the deployment process, configure Jenkins or GitLabRunner. Now, we can subscribe to services which will do all of these things for us. Isn’t it great? We get to do only a few clicks, configure a few variables, and the whole process works. There are no more issues with CI machine updates, failures, etc.
These smooth solutions are available right now for everyone. Let’s check some of them! Also, we can configure a great tool called DANGER that helps developers managing pull requests; we configure rules – included in pull requests, such as checking if the pull request isn’t too big. In this article, we are going to take a more in-depth look into DANGER and its configuration and integration with BitBucket and Bitrise.
We can describe Bitrise as a mobile app development-oriented platform for Continuous Integration and Delivery. It contains a collection of tools and services which can help developers with the deployment process and much more. For integration, we only need a repository with our codebase (it can be on GitHub, Bitbucket, GitLab) and Bitrise account. After a short set up (that part we will cover later), we are ready to build the workflow of our application deployment. The good part is when Bitrise is building our app/handling pipeline, we have time to develop new features or get a coffee break. All steps are automated. The developer doesn’t have to take care of machine updates, scripts updates, etc. Bitrise maintains all that work.
Bitrise can be used with accessible repositories platforms such as GitHub, GitLab, and Bitbucket. In this article, we will cover Bitrise integration with Bitbucket Cloud Repository.
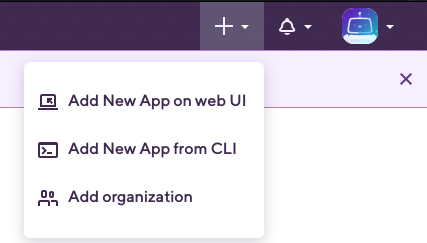
After creating the Bitrise account, we have to make a new application on Bitrise. To do it, we click the ‘Plus’ button on top of the website and choose the “Add a new app on web UI” option.
As next, we get to see a form to fill out. It includes fields such as choosing an account, connecting our repository with Bitrise, selecting branches, etc. This step is well-documented there: https://devcenter.bitrise.io/getting-started/adding-a-new-app/
We can have multiple workflows for one application. I’ve decided to have one for PullRequest (which will get triggered by creating a new pull request on BitBucket) and another for development application release to AppCenter or Firebase App Distribution. So let’s have a look at my PullRequest Workflow:
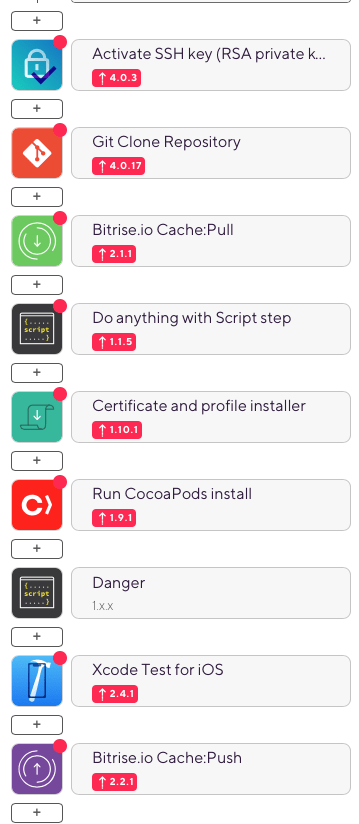
As you can see, we can configure all steps with a subtle web UI. Everything gets well documented, so the configuration process isn’t hard. Moreover, Bitrise will create a basic workflow for the iOS application! We need to adjust it to our purposes.
‘Danger’ is a helpful tool to automate Pull Requests’ basic check. For example, if the developer creates a proper name of PR, including a message, a pull request isn’t too big. To configure that with our project, we need to install Danger on our machine, create Dangerfile, then push that file onto our repo, configure bitbucket account, which will be posting comments to our PR, and finally run it on Bitrise Workflow.
We need to open a terminal and paste the following command: brew install danger/tap/danger-swift

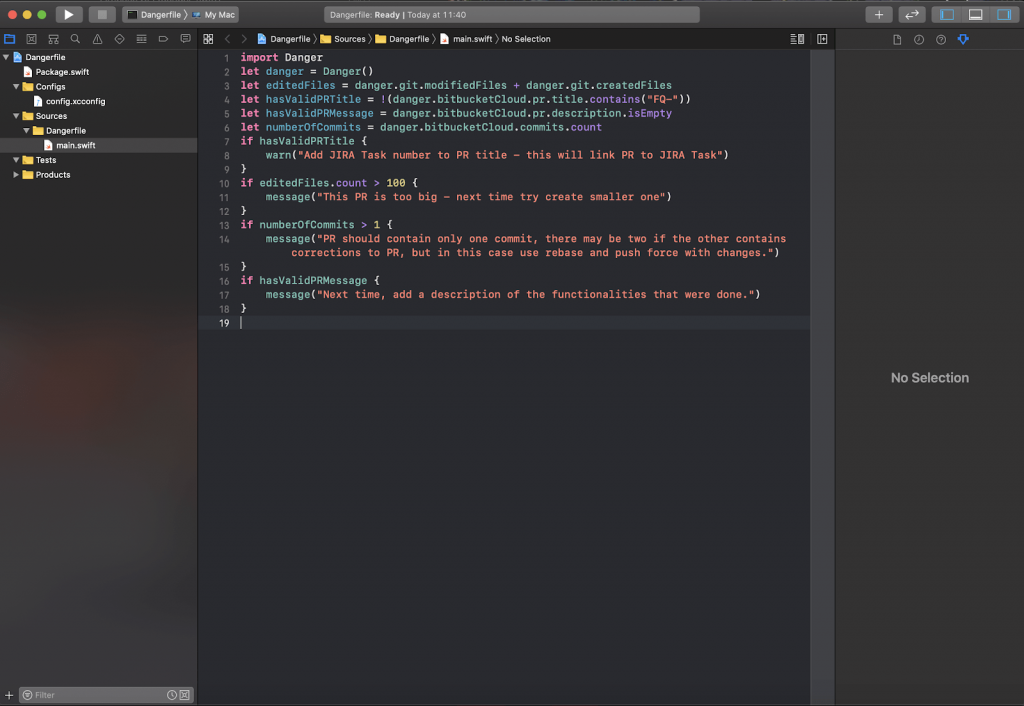
Next, we have to go to our project root directory in the terminal. In the project root folder, we need to run the following command: danger-swift edit. That will open another Xcode instance. Now we select the main folder from the list of files and then main.swift – there we can configure our Pull Requests Danger Rules – on the screen below you can see our sample Dangerfile content:
After ending editing these rules, we can close this new Xcode instance. In the terminal, we need to hit enter. After that, we can push our file to bitbucket and create a new Pull Request with that.
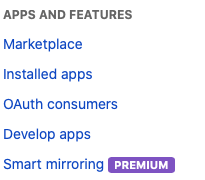
The next step is to create a new bitbucket account (or we can use our existing one if preferred ) and configure OAuth tokens. To do so, we have to log in, select workspace, and then we can go to settings. On the screen below, you can see which settings we need to click:
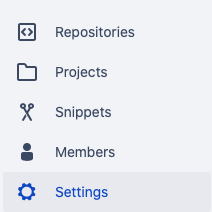
Next, from the left sidebar menu, we have to select OAuth consumers’ options.
Here we can add a new consumer by clicking: Add consumer button.
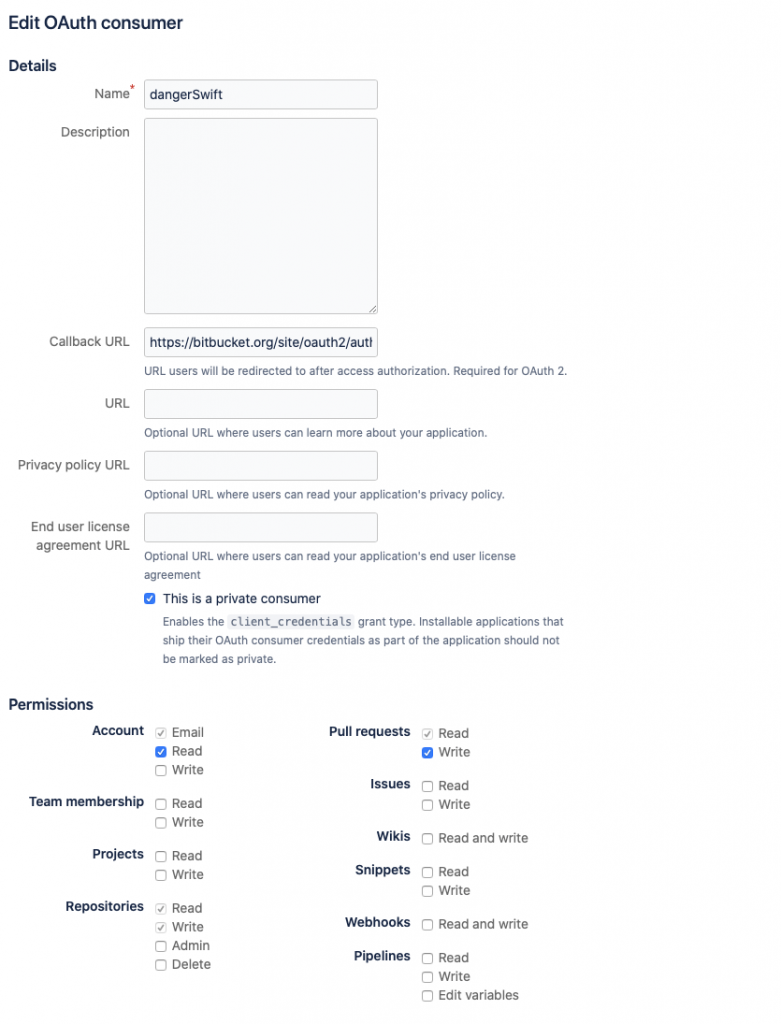
Here we need to set every option as shown on the screen. Callback URL should be: https://bitbucket.org/site/oauth2/authorize, and we need to select the option “This is a private consumer” – this option is mandatory for Danger-Swift! (For android projects consumer settings are the same, but private consumer option is unchecked)
After we ‘save’ a new consumer, we see it on the list of consumers. We have to copy key and secret codes – they will be needed.

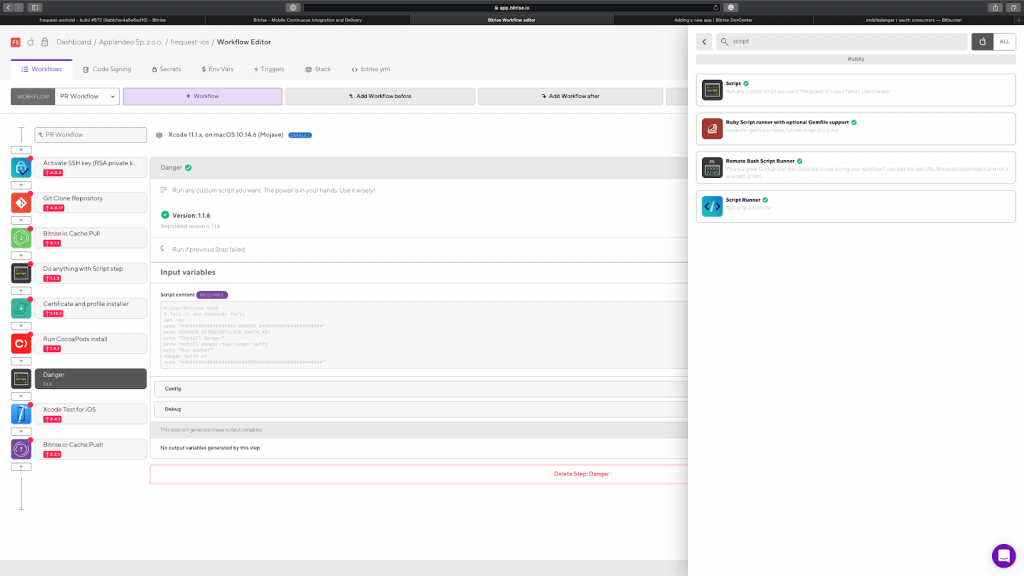
Now we have to turn on danger on Bitrise workflow – so let’s go back to our workflow editor. After doing a step “Run CocoaPods install,” we have to add the new one – clicking plus button below “Run CocoaPods install” and searching for “Script”:
We will see the following form with configuration:
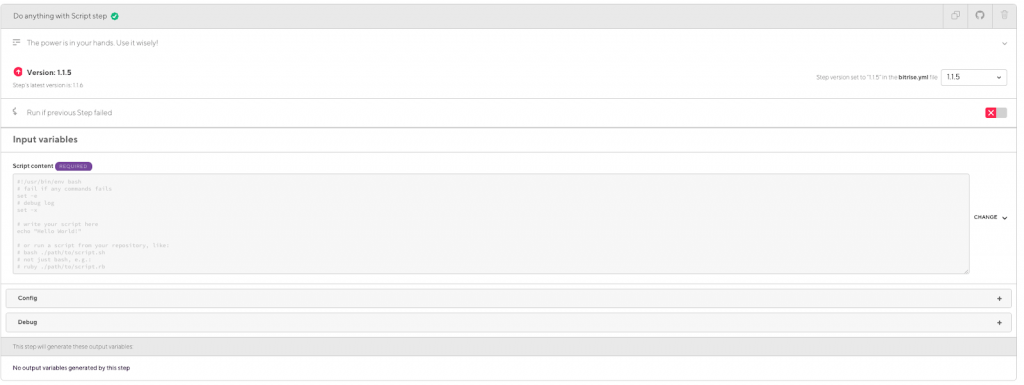
So let’s configure it – in a Script Content paste the following script:
#!/usr/bin/env bash
# fail if any commands fails
set -ex
echo “Danger instalation"
brew install danger/tap/danger-swift
echo "Run danger"
danger-swift ci
Now, let’s click save on the right side (or use the keyboard shortcut CMD+S). Ok, the script got configured! Let’s declare some environmental variables to make it work. Select ‘Env Vars’ tab from the top bar. On the new screen, find a section with variables for your workflow (in this example, the workflow has the name ‘PR Workflow’). Finally, add four new variables; their names are the following:
Values for these variables are quite simple:
And that’s it! From now on, when you run your workflow, and some of the rules configured in Dangerfile got violated, it should make a comment in your Pull Request.
 Hi, I’m Marcin, COO of Applandeo
Are you looking for a tech partner? Searching for a new job? Or do you simply have any feedback that you'd like to share with our team? Whatever brings you to us, we'll do our best to help you. Don't hesitate and drop us a message!
Drop a message