
iOS Project Deployment to AppCenter and Firebase App Distribution
Let’s take a more in-depth look into the Application Deployment with AppCenter and Firebase App Distribution.
Let’s take a more in-depth look into the Application Deployment with AppCenter and Firebase App Distribution.
In our previous article iOS Project with Bitrise, Bitbucket and Danger, we’ve covered BitBucket integration with Bitrise, and we’ve also added DANGER integration. Now it is time to jump into the application deployment process. After each pull request gets merged, our application will show up in the AppCenter or the Firebase App Distribution.
Let’s create a deploy workflow. We click +Workflow on the Workflow editor, and then we can choose which of the previous workflows to use as a template for the new workflow. We can select PR Workflow. Then, from this new workflow, let’s delete the tests step and the danger step.
Here we add Xcode Archive & Export for the iOS step. From step form, we need to choose a method for export – we can select development, and then we need to insert the developer portal team identifier – this one you will pick from developer.apple.com, after login on the right side below you account name you will find it.
Next, we should add the AppCenter IPA upload step after Xcode Archive & Export for the iOS step. For this step we will do as the following:
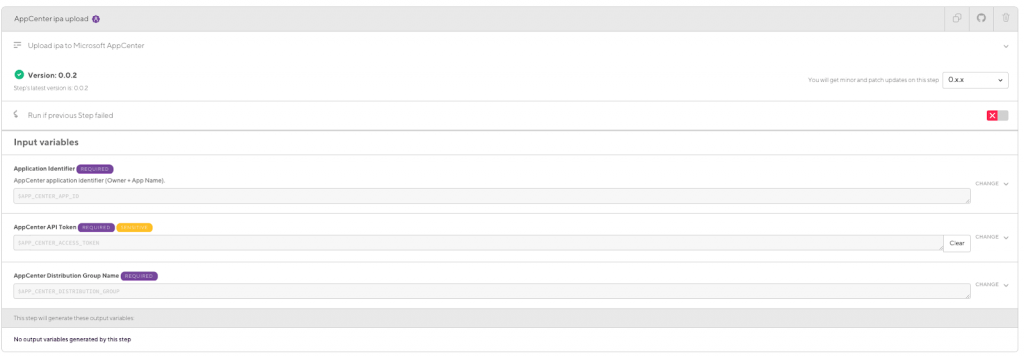
As you see, you will need some new variables, so let’s add them.
(I assume you have configured the app center account with applications and distribution group)
You need to Open AppCenter, and then choose your application. On the screen, where you can see details of the application, check LINK in a web browser – for our purposes the link is as following: https://appcenter.ms/orgs/Applandeo-1/apps/FreQuest-Dev
The organization is Applandeo-1 and the application is FreQuest-Dev. But on UI, you will see other values – these from the link are correct!
At this stage, we need to move to AppCenter account settings (on the top bar, click the profile icon on the right and select Account Settings), then click the pencil icon on the right of the API Tokens option and create a new one. After creating it, copy it.
We are moving back to Bitrise – select the env vars field and declare the following variables:
And declare one new secret:
As values you will insert:
Click save and that’s it – now at the next build, your application will be sent to the AppCenter!
We can also distribute the app in Firebase App Distribution – so let’s configure that. (I assume you have configured firebase application and firebase project)
Firstly, we need to obtain firebase token – open terminal and run the following command:
curl -sL firebase.tools | bash
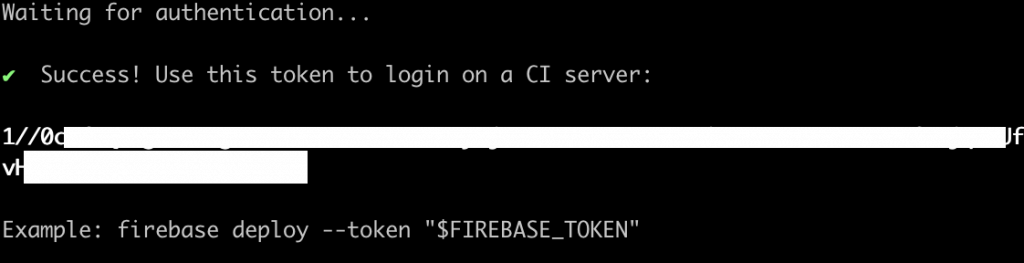
After successful installation, run the next command: firebase login:ci
This command will open your web browser, and you have to log in with credentials which you use to manage your Firebase project. After successful login on the terminal you will have printed out your firebase token:
Move to the firebase console, and from the left sidebar, choose App Distribution. On the new right form, click Get Started, and you will see an empty form with the latest released version. From the top tab bar, let’s choose the option testers&groups, then we can add some testers and create groups – it’s simple, all we need to do is to insert tester email, then in groups, click add a group.
Here we need to type a name of that group and assign users to this group. Copy the name of a group (but this right one, not left!).

Move to Bitrise workflow editor. In the deploy workflow, we can delete AppCenter Distribution, and instead of this step, we can add a new one – [Beta] Firebase App Distribution. Form of this step is the following:

You have to configure some extra environment variables and secrets – you have to add $FIREBASE_APPLICATION_ID variable and $FIREBASE_TOKEN secret. After that, you need to select them in this form.
At the bottom of the form, you can insert testers’ emails or names of the tester group – enter the name of the testers group that we configured before. And that’s it – click save, and you are done – right now after the next build, a new version of the application will appear in Firebase App Distribution!
 Hi, I’m Marcin, COO of Applandeo
Are you looking for a tech partner? Searching for a new job? Or do you simply have any feedback that you'd like to share with our team? Whatever brings you to us, we'll do our best to help you. Don't hesitate and drop us a message!
Drop a message